How to setup RTMP live streaming using vMix for MeetView
Make sure that you have vMix installed on your computer. You can purchase or
download a free trial from their website. (https://www.vmix.com/)
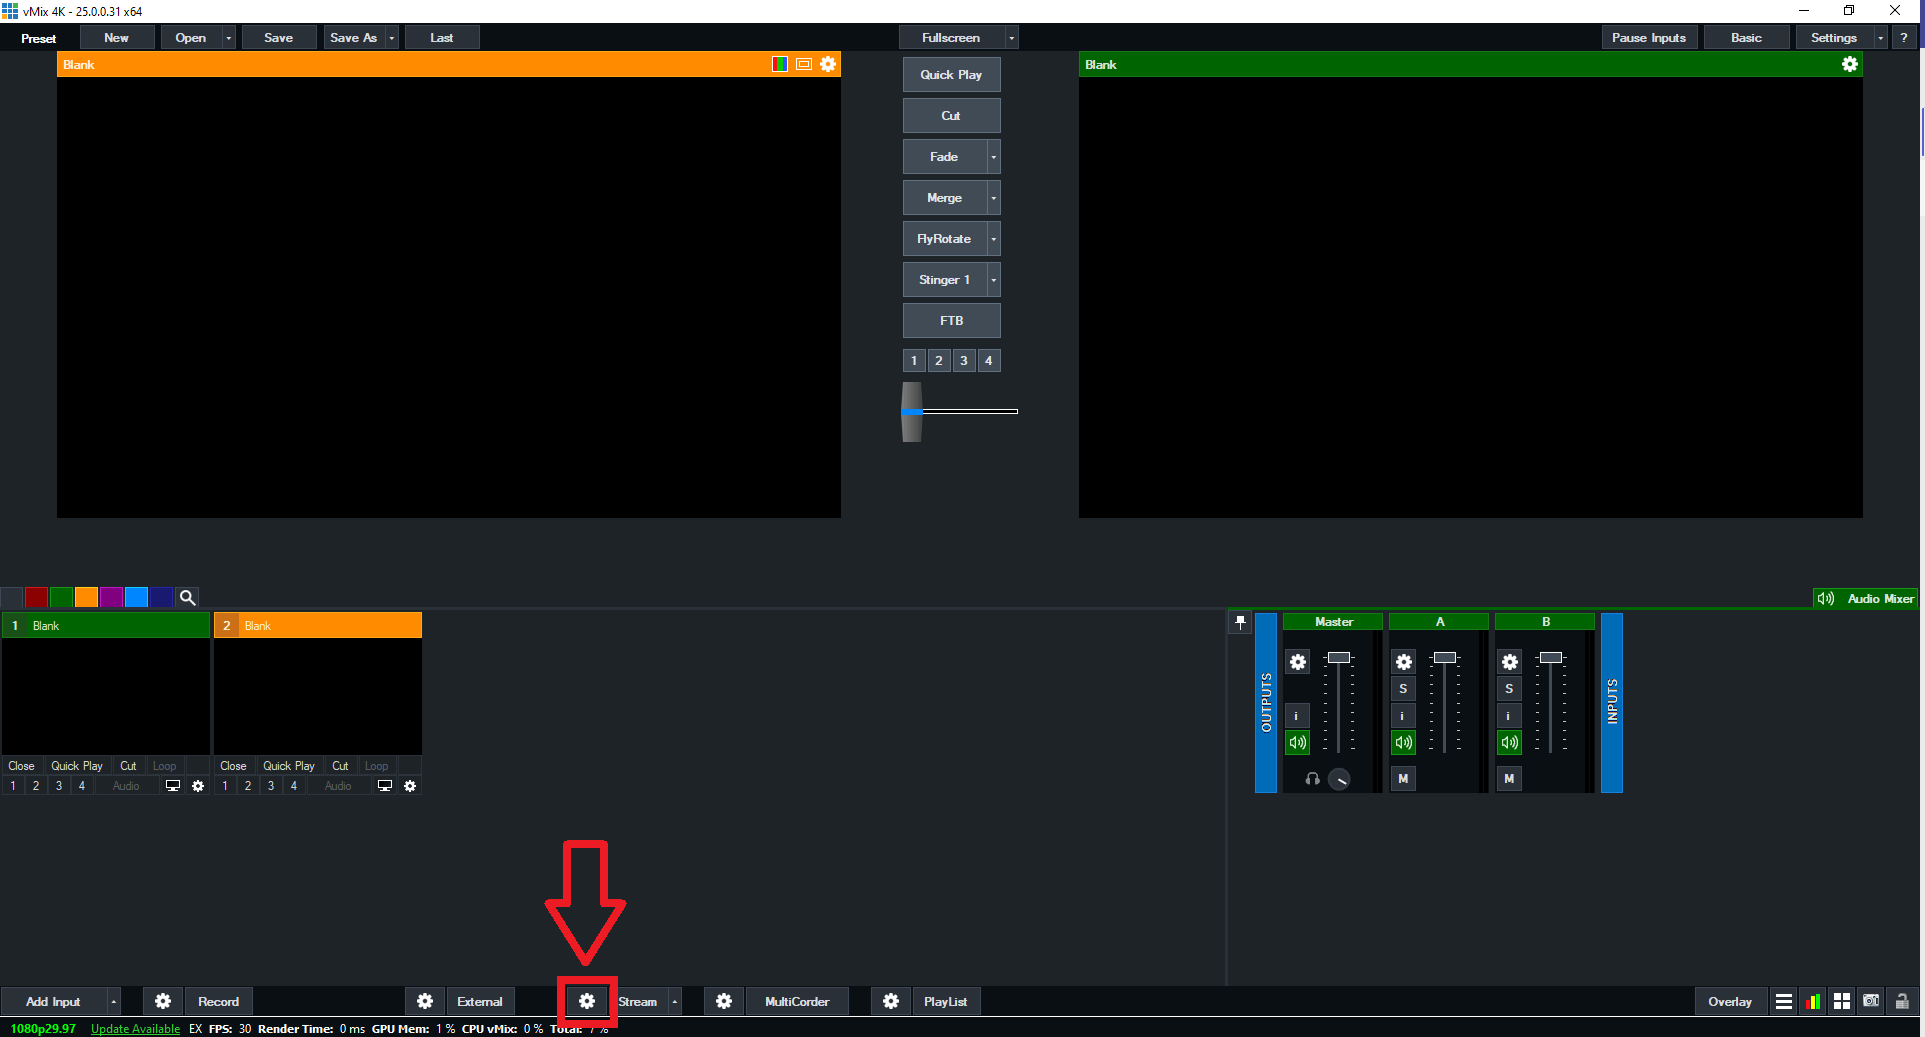
Open vMix and click on the gear icon next to the Stream button on the bottom of the
window
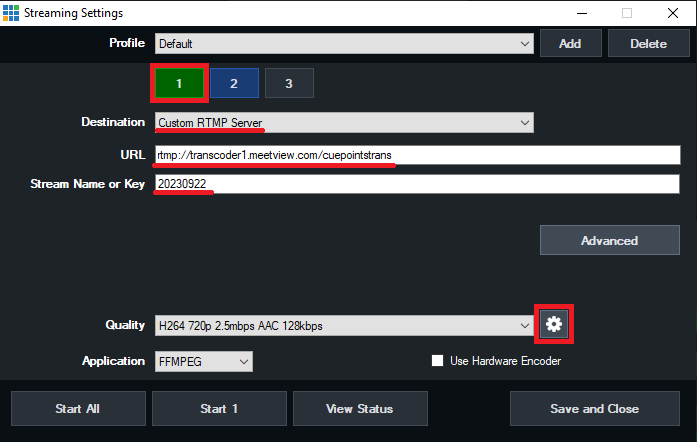
On the next window you will need to set the Destination, URL and Stream Key.
These will go as follows:
Destination: Custom RTMP Server
URL: rtmp://transcoder1.meetview.com/cuepointstrans (You can copy and
paste from this email)
Stream Name or Key: This will be provided to you by Resolve Collaboration,
but it is usually the date of the production in YearMonthDay order as shown
below
Quality: H264 720p 2.5mbps AAC 128kbps
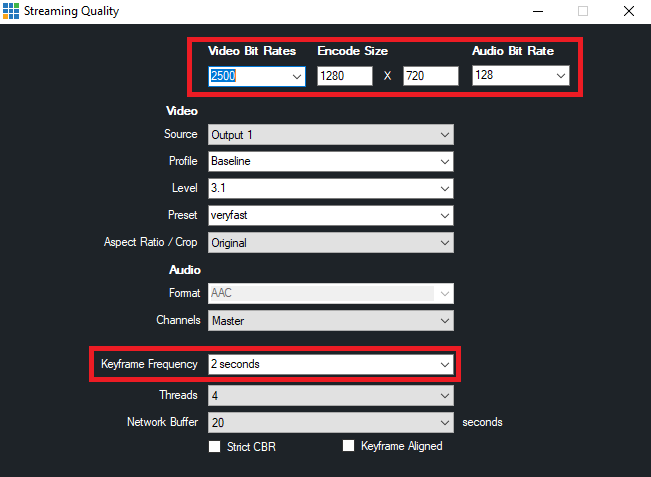
Click the Quality settings icon. Set Keyframe Frequency to 2 seconds. Close the window.
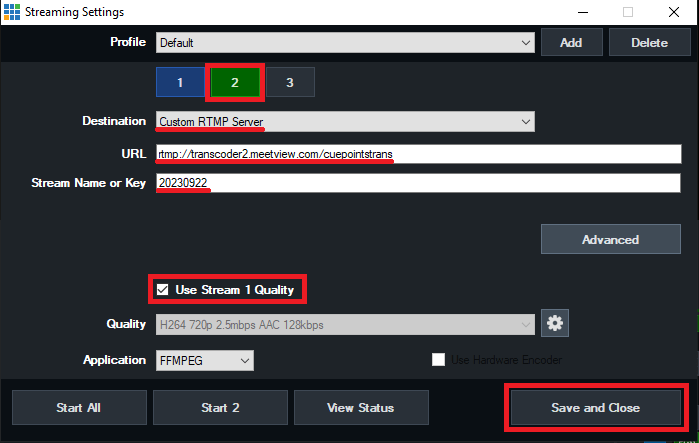
Next click on box number 2 near the top. Do as follows:
Set the Destination to the same as box 1
Set the Stream Key to the same as box 1
Set the URL to transcoder2 instead of transcoder1 (You can do that simply by
using the same address as before, and just changing the 1 to a 2, or you can
cope and paste this URL: rtmp://transcoder2.meetview.com/cuepointstrans
Check the box to use Stream 1 Quality
Press Save and Close on the bottom Right.
To start the stream just press the Stream button on the bottom bar.
Press the same button again when you are ready to end the stream.
Congratulations, you have successfully setup and streamed a session using vMix
and RTMP.